As I discovered a few years ago, learning how to make apple cider vinegar is a simple way to use apple scraps and save money. When you make your own apple cider vinegar, you cut costs at grocery stores and add a valuable, versatile staple to your pantry.
Here's how I got started making homemade apple cider vinegar at our off grid home a few years back. It's a good way to use up all the extra apple bits.
Why You Should Make Your Own Apple Cider Vinegar
Making your own apple cider vinegar is a great way to stretch food scraps while improving food security. Apple cores, apple peels, and other food scraps that might head to the compost bin can instead become a batch of vinegar with countless uses.
The final product works for everything from salad dressings to natural cleaning solutions. I also use apple cider vinegar as a natural hair rinse; it makes my greying curly hair soft and manageable.
Homemade vinegar also comes with health benefits. A recent study suggests that raw apple cider vinegar may help with blood sugar balance and even support weight loss.
And unlike store-bought apple juice turned into vinegar, your own homemade apple cider vinegar contains beneficial bacteria and wild yeasts. These develop during the fermentation process.
Another great thing: after you strain out your apple pieces, you can add them to your homemade chicken feed or toss them in the compost bin. Nothing goes to waste.
And if you've been cooking up big fall batches of apple butter, applesauce, apple sour cream coffee cake, or even apple cider, you'll have plenty of scraps ready to put to work in your next batch of vinegar.
How to Make Apple Cider Vinegar From Scraps
Here's a simple way to turn scraps into homemade vinegar. This method uses apple cores, apple skins, and apple peels.
Basically, all the parts left over after making apple pies, apple crisp bars, or even oatmeal apple cookies. If you've just finished a big apple harvest, this is the best option for using up extras.
Homemade Apple Cider Vinegar Ingredients
You first need to gather enough apple scraps for a quart jar or a large wide mouth mason jar. Choose organic apples when you can, since they don't carry pesticide residues that may interfere with the fermentation process.
- Apple scraps (apple cores, peels, apple pieces)
- 2-3 tablespoons sugar or a little bit of raw honey for each cup of water used
- 2 cups filtered water (avoid chlorinated water or straight tap water)
- A sterilized jar (mason jar, quart jar, or smaller jar if needed)
- A coffee filter or a scrap of cheesecloth
- A rubber band or elastic band
Directions for DIY Apple Cider Vinegar
Before you begin, remember to clean and prepare your supplies. Because making apple cider vinegar involves fermentation, it is vital that you kill off any unwanted bacteria.
That means thoroughly cleaning and boiling your supplies before you start. This step helps ensure that your apple cider vinegar turns out well and doesn't simply rot instead of fermenting.
Use bottled water without chlorine. City tap water is often treated with chlorine, and chlorine kills not only germs but also the wild yeasts needed for fermentation. Our off grid water supply comes from our lake, so no chemicals or preservatives to worry about.
If tap water is your only option, let it sit out overnight before using, or use distilled water as the best option.
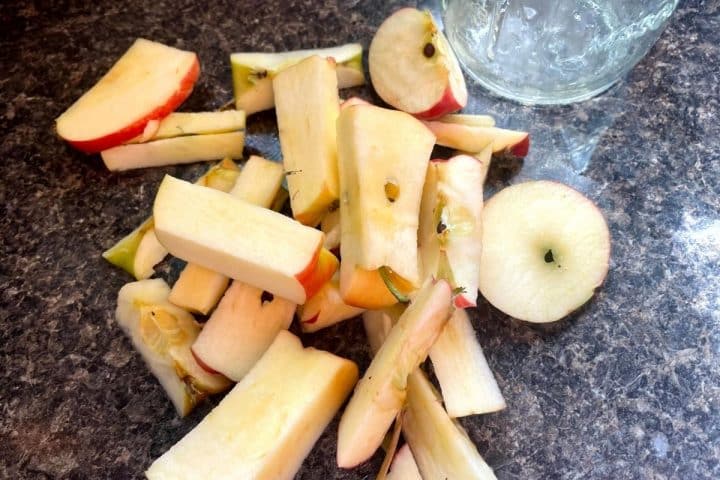
Next, gather your apple scraps. These can be soft bits you cut off the apples, peels, or cores. If you're using stored apples, cut out the rotting pieces.
Any parts that aren't visibly rotting can go into the jar. Keep the fleshy parts for other projects; after all, there are so many ways to use leftover apples.
Let them brown in the air while you work. This isn't a problem when making apple vinegar. In fact, it helps encourage the fermenting process.
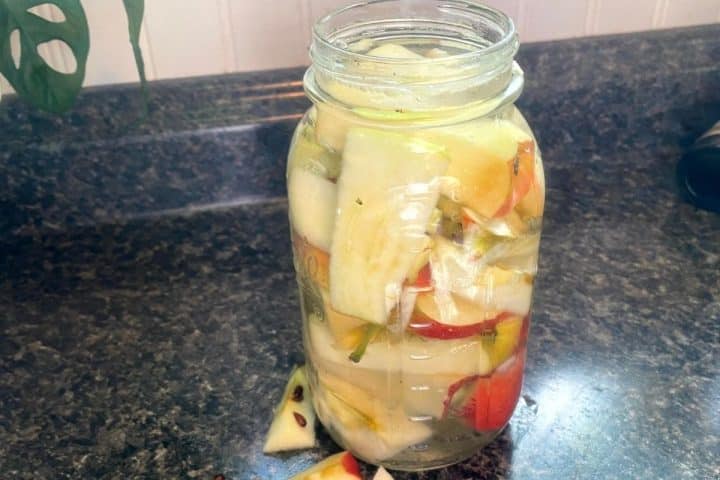
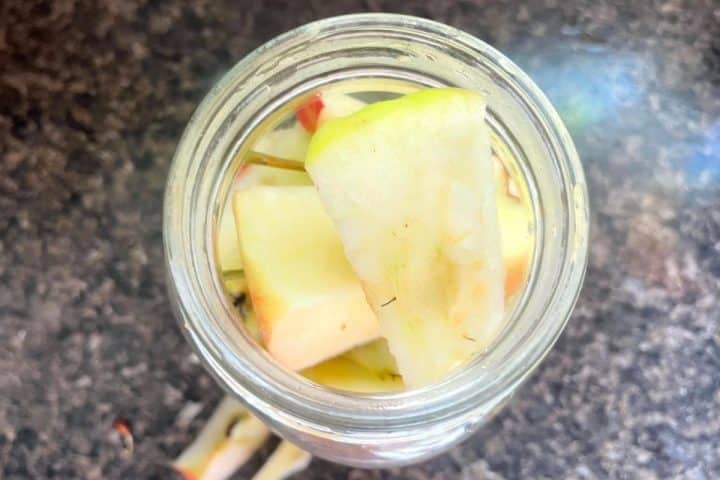
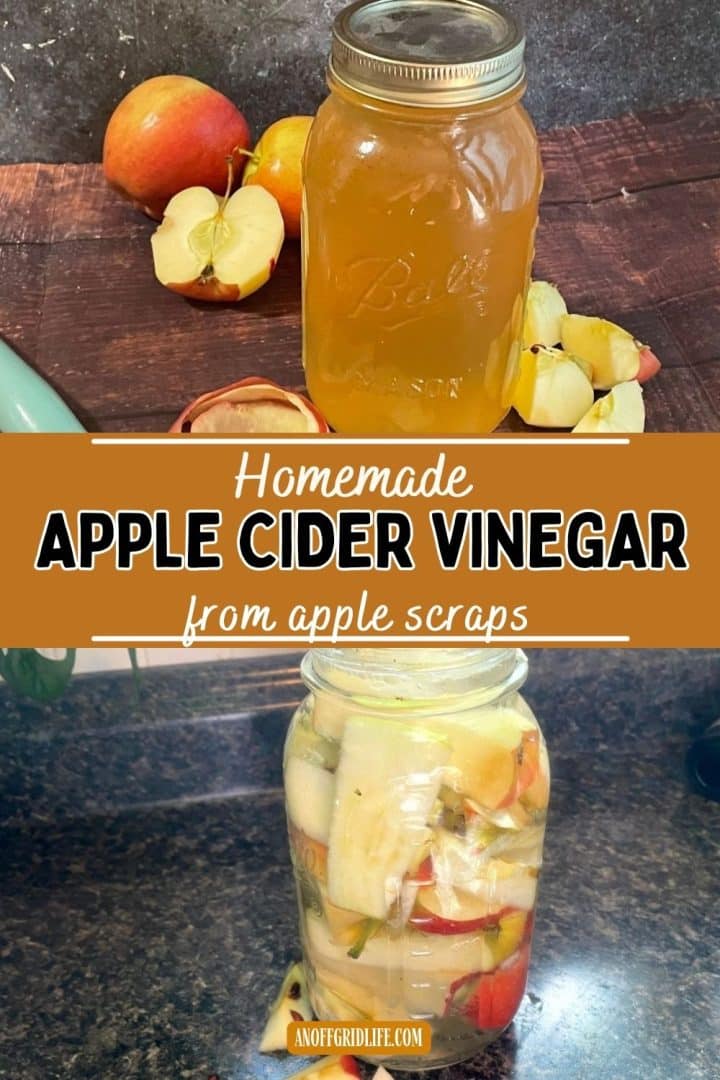
Next, fill each glass jar three-quarters full with scraps. This leaves enough space for the liquid while providing plenty of fruit to get the fermentation process going.
And did I mention that this is a great hands-on activity for kids? Just another useful homeschool life skill.
Mix together a pitcher of filtered, unchlorinated water with 2 tsps of sugar or 1 teaspoon of raw honey for each cup of water. While you can skip the sweetener, adding it makes success more likely. It fuels alcoholic fermentation before the acetic acid fermentation that creates true apple cider vinegar.
Pour the liquid over your scraps, leaving at least one inch of space at the top of the jar. Cover the top of the jar with a coffee filter or piece of cheesecloth secured with a rubber band or elastic band. This allows airflow but keeps out dust and fruit flies.
Move your jars to a warm spot in a dark place out of direct sunlight. A kitchen cupboard or the cabinet above the stove is a great place.
Keep your jars at room temperature and stir them every few days to encourage fermentation. If a gray or brown film develops on the surface of the water, skim it off.
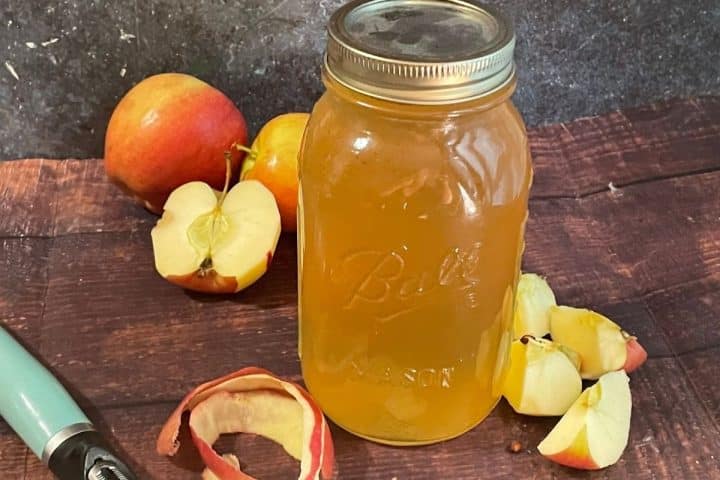
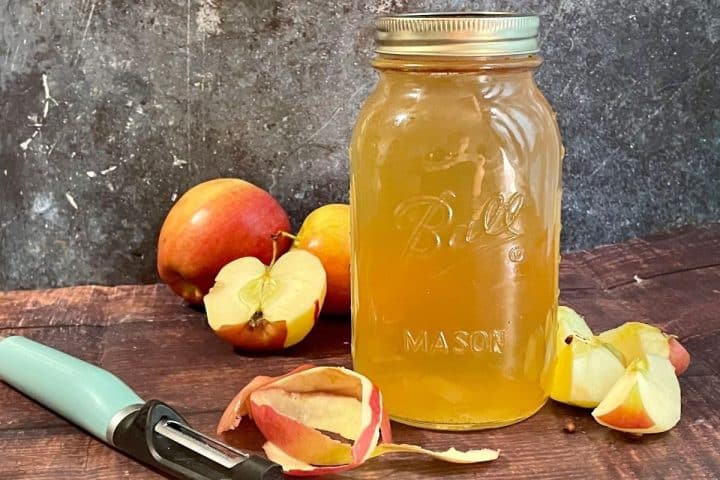
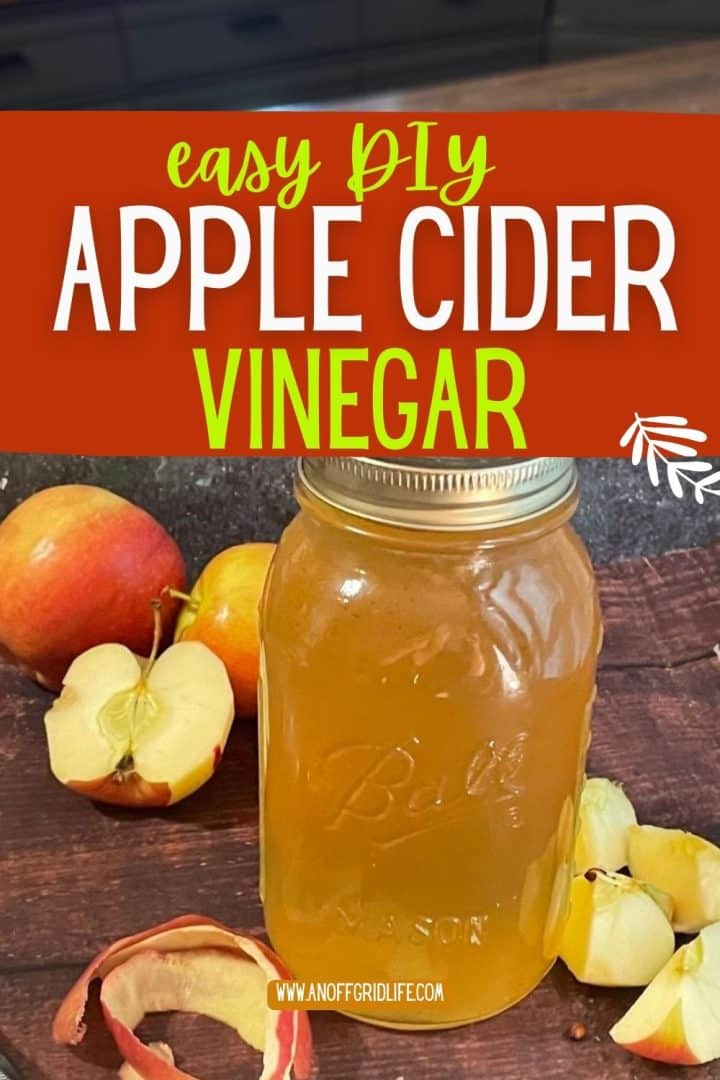
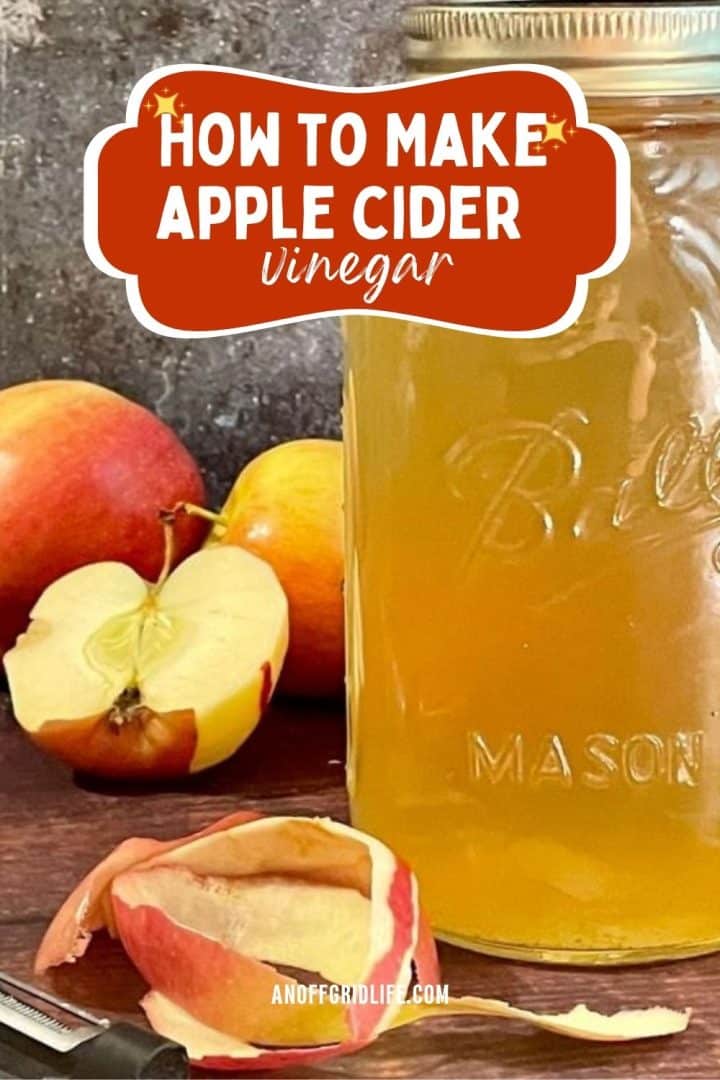
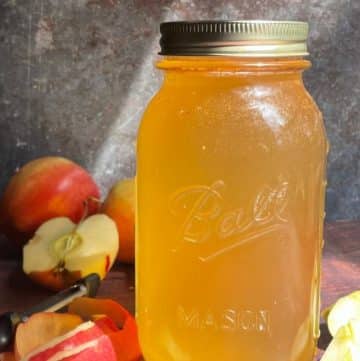
After about two weeks, strain out the apple scraps and place the liquid back in the sterilized jar. At this stage, it should smell like sweet hard cider.
Loosely cover the jar again and let it sit for another three to four weeks. During this time, the vinegar will ferment and begin to acidify. By the end of this stage, you should have your own homemade apple cider vinegar with the sharp, acidic taste of a finished final product.
As the vinegar ferments, you may see a gelatinous blob form at the bottom of the jar or floating at the top of the jar. This is the vinegar mother, also called the mother of vinegar, and it's a good sign. It contains beneficial bacteria and can be used to jump-start your next batch.
Homemade Apple Cider FAQs
Have questions about how to make apple cider vinegar? Here are some of the most common ones. If you don't see your question here, leave it in the comments.
Is making vinegar with apple scraps the same as making apple cider vinegar?
Yes, I would say so.. A homemade apple scrap vinegar recipe uses peels, cores, and apple pieces instead of whole apples or fresh apples. The resulting vinegar is the same - it still goes through alcoholic fermentation followed by acetic acid fermentation.
Can I use metal containers instead of glass jars?
Metal containers aren't the best option. Acidic vinegar can corrode metal. Stick with a wide mouth mason jar or glass jar for the safest results.
How do I know if my vinegar is ready?
The final product will have a strong vinegar smell and tangy flavor. If it still smells like hard cider or sweet apples, give it another week or two.
What can I do with the vinegar mother?
The vinegar mother is full of beneficial bacteria. Save it in your jar, or move it to a previous batch or next batch to speed things up. You can also share it with friends learning how to make ACV for the first time.
What are common uses for apple cider vinegar?
Besides salad dressings, common uses include natural cleaning, rinsing produce, adding a splash to baked goods, and using it for its health benefits.
Make Your Own Apple Cider Vinegar and Save
Learning how to make apple cider vinegar is a great way to cut waste, save money, and become more self-sufficient. The good news is that with a first step as simple as collecting apple scraps, you can enjoy making your own homemade apple cider vinegar for years to come.
Like this post? Save it, share it, and read it!


Recipe
Homemade Apple Cider Vinegar From Scraps
Equipment
Ingredients
- 4 apple scraps use skin and cores
- 2 teaspoon granulated sugar optional
Instructions
- Remove rotting or bruised parts of apple scraps.
- Fill each 8 ounce mason jar ¾ full of apple scraps.
- Fill a small pitcher with 1 cup of water. Use distilled or bottled water if needed.
- Add 2 tsps of white sugar to the pitcher and stir well.
- Pour water into jar, covering apples scraps + leaving 1 inch of headspace.
- Cover top of jar with a coffee filter or cheesecloth, secure with rubber band.
- Store in a warm dark place for two to three weeks.
- Stir jars every three days, skim off grey or dark matter.
- After two weeks, strain out apple scraps, keeping liquid.
- Let liquid sit for another three weeks.
- Keep the apple cider vinegar "mother" to add to food or to quick-start another batch of DIY apple cider vinegar.