Are you ready for a very simple self-reliance activity? Learning how to grow microgreens in a jar is an excellent way for individuals interested in homesteading, self-reliance, and living off the grid to cultivate fresh produce indoors.
Estimated reading time: 11 minutes
Growing sprouts in glass jars provides an opportunity for year-round indoor gardening, making it perfect for people looking for alternative food production methods.
I started growing microgreens in mason jars with my grandmother as a child. Watching those seeds turn into green sprouts on my grandma's kitchen counter seemed almost magical.
And many years later, when I had the chance to grow my own sprouts with my children, they were just as thrilled.
Today, you'll learn about the supplies needed and where to source high-quality microgreen seeds online. I'll also share step-by-step instructions on setting up your mason jar indoor garden and caring for your microgreens throughout their growth cycle.
Defining Microgreens and Their Benefits
You're eating microgreens when you harvest edible plants' young, tender shoots about two weeks after planting. Microgreens have recently become popular due to their high nutrient content. They're a good option as an inexpensive, tasty addition to your diet and can provide numerous health benefits.
What are microgreens?
Microgreens are small greens that grow from the seeds of various vegetables and herbs, such as radish, kale, or basil. They're typically harvested just after they've sprouted and produced their first set of true leaves. This usually occurs about 7-14 days after planting.
Because they're so young when harvested, these tiny greens pack a powerful punch in flavor and nutritional value compared to their mature counterparts.
Nutritional value of microgreens
- Vitamins: Microgreens contain higher concentrations of vitamins A, C, E, and K than mature plants.
- Micronutrients: These little powerhouses also provide essential minerals such as iron, calcium, and potassium, contributing to overall health.
- Fiber: Like other leafy green vegetables, microgreens are a great source of fiber. They promote healthy digestion by adding bulk to stool and preventing constipation or diarrhea.
- Polyphenols: A recent study that consuming polyphenol-rich foods like microgreens can reduce the risk of heart disease, cancer, and Alzheimer's.
Adding fresh sprouts to meals can add flavor and essential nutrients. And growing microgreens at home in glass containers is an easy way to enjoy these benefits without relying on store-bought produce that may lose some nutrients during transportation or storage.
Microgreens are an excellent source of nutrition for those looking to begin their homesteading journey and are a great place to start. For beginner-friendly microgreen varieties, try alfalfa sprouts, broccoli sprouts, kale sprouts, or radish sprouts.
Best Beginner-Friendly Microgreen Varieties
If you're starting indoor gardening, choose microgreens that are easy to grow and maintain. When you choose this type of seeds, you can build your confidence and skills before moving on to more challenging varieties. Four good choices for beginners include alfalfa sprouts, broccoli sprouts, kale sprouts, and radish sprouts.
Alfalfa Sprouts
Alfalfa sprouts are a classic choice for growing in jars due to their fast growth rate and high nutritional content. They're rich in vitamins A, C, E, and K and minerals like calcium and iron.
To grow alfalfa sprouts, soak a small amount of seeds overnight for 8 - 12 hours before placing them in a jar with a mesh or cheesecloth cover. I love alfalfa sprouts on salads and scrambled eggs- so good.
Broccoli Microgreens
Broccoli microgreens offer an excellent source of antioxidants such as sulforaphane, which helps protect against various diseases. These greens have a mild flavor, making them perfect for salads or sandwiches.
Growing broccoli sprouts is similar to growing alfalfa sprouts. Just make sure they get enough sunlight to grow properly once they germinate.
Kale Sprouts
A superfood known for its numerous health benefits, kale sprouts are packed with vitamins A, C, and K, calcium, and iron. Their slightly bitter taste adds depth to your dishes. To grow kale sprouts in a jar, follow the same process as for alfalfa or broccoli microgreens, but allow them more time to germinate before exposing them to sunlight.
Radish Sprouts
Radish sprouts offer a spicy kick that can liven up any dish while providing nutrients like vitamin C and potassium. Their signature red stems are also a pretty addition as a garnish or when mixed into salads.
Growing radish sprouts in jars is similar to other varieties mentioned above. Just keep your jar clean so they have enough room for proper growth.
Growing these microgreens in jars at home will help you build confidence as a gardener. You'll add to your food supply while enjoying fresh, nutritious produce from your kitchen.
Get the supplies you need at the grocery store. Or search for quality seeds to purchase online.
Top Online Sources for Buying Quality Seeds
Successful growth and optimal nutritional value in your indoor kitchen gardens or outdoor organic gardens may depend on buying quality organic seeds from reliable sources
. Three recommended online retailers include Amazon.com, True Leaf Market, and Johnny's Selected Seeds. These providers offer a wide range of options for growing microgreens.
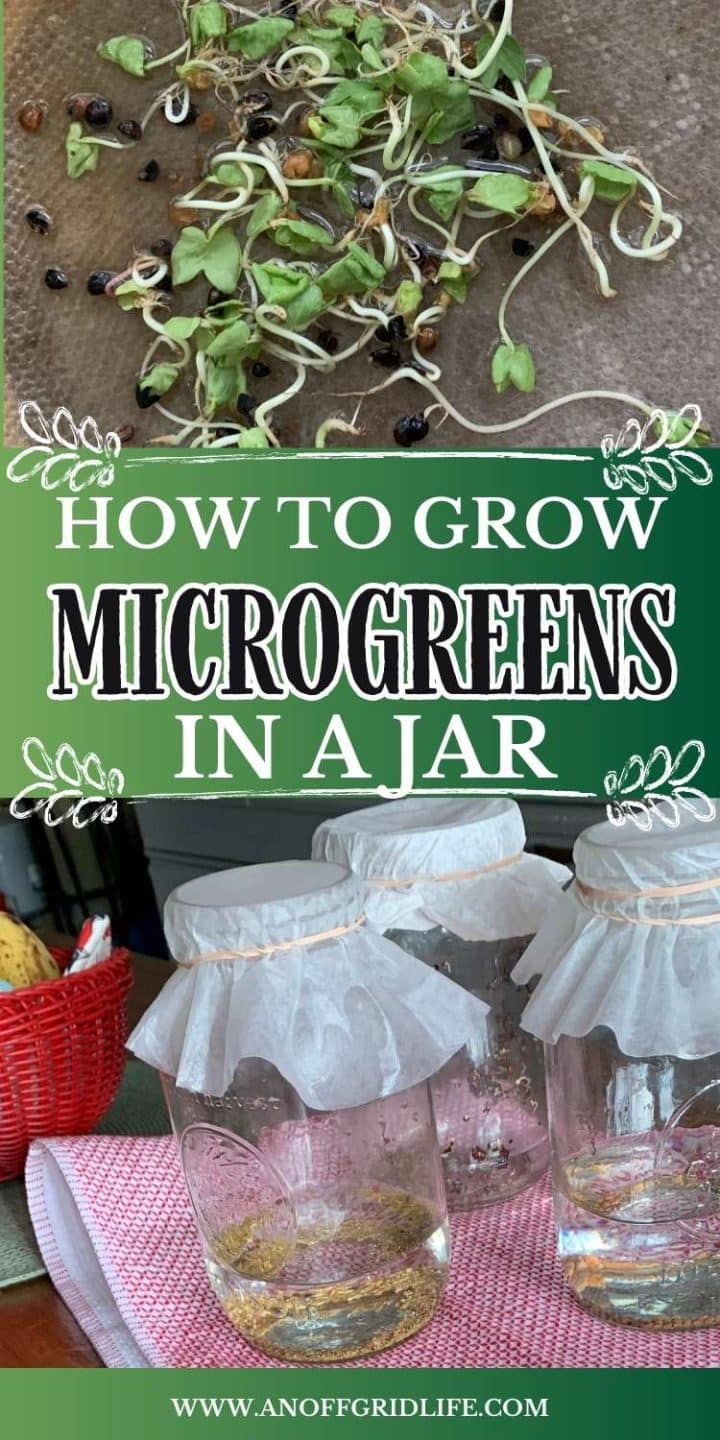
Growing Microgreens in a Jar
If you're looking for a simple way to grow micro greens, growing them in a quart jar is a great option. This seed sprouting technique requires little space, can be done year-round, and is a simple first step to becoming more self-reliant. It's also a fun homeschool activity.
Choosing the Right Glass Jars for Growing Microgreens
Starting microgreens in a jar is a simple and practical approach to consuming fresh, nutritious greens without needing a large backyard garden. In fact, you don't even need a kitchen garden. You can grow your microgreens right in your kitchen.
The type of glass jar you choose can significantly impact how well your seeds grow. We've had good luck using 8-ounce wide-mouth mason jars.
Mason Jars with Perforated Lids
Mason jars are among the most popular choices for growing sprouts or microgreens at home. However, you can also buy special sprouting jars.
To grow microgreens effectively in mason jars, consider using perforated lids that allow water drainage while keeping seeds from escaping during rinsing.
Now, while you can buy these lids online, we made our own DIY sprouting lids in minutes.
Cheesecloth/Mesh Jar Cover Alternatives
A good draining lid ensures proper air circulation, which is necessary for healthy plant growth. You can purchase specialized sprouting lids designed specifically for mason jars or create your own by drilling holes into standard metal lids.
If you don't have access to perforated lids or prefer a more budget-friendly option, cheesecloth or mesh material can be used as an alternative jar cover when growing sprouts and microgreens.
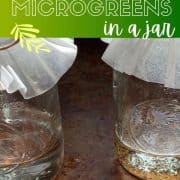
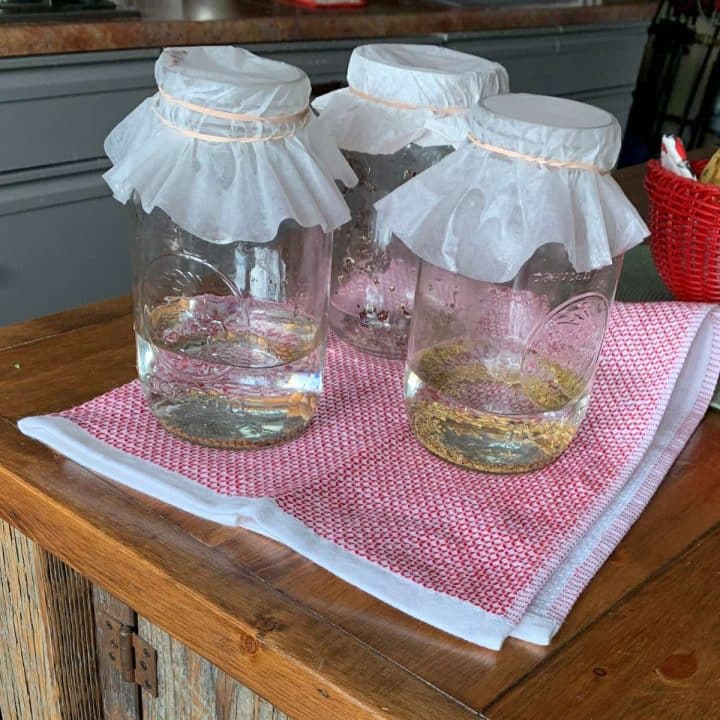
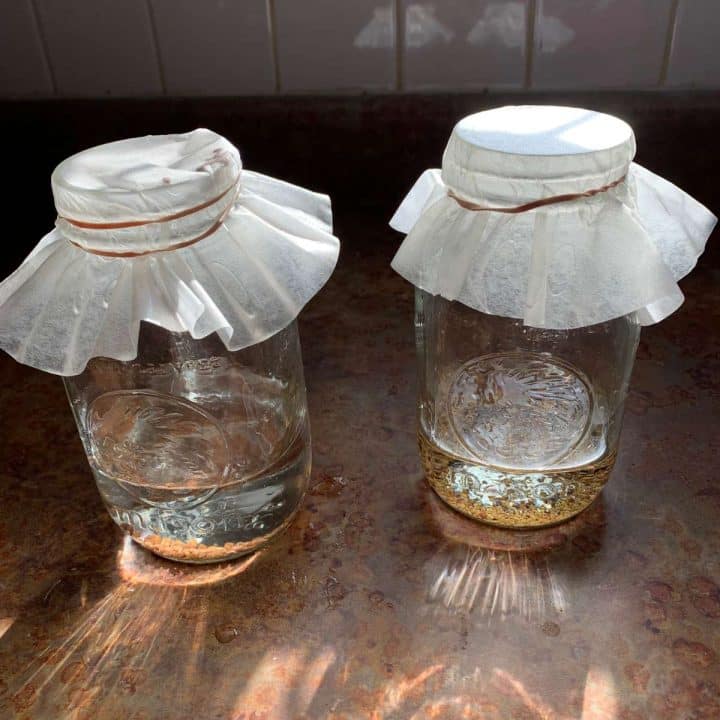
Cut a piece of cheesecloth or mesh screen large enough to cover the jar opening and secure it with a rubber band. I sometimes use coffee filters held in place with rubber bands.
- Cheesecloth: This natural, breathable fabric allows for excellent air circulation while keeping seeds contained. Choosing a cheesecloth with a fine weave is essential to prevent smaller seeds from slipping through the gaps.
- Mesh Screen: Like cheesecloth, mesh screens provide proper ventilation and drainage for your microgreen growth project. Ensure the mesh size is small enough to keep small seeds inside, allowing water and air exchange.
How to Grow Microgreens in a Jar
All you need is just a few supplies and a simple process. Here's how to get started in just a few simple steps.
Gather Necessary Supplies
To get ready to grow microgreens in a jar, gather the following supplies:
- Glass jars, such as mason jars with perforated lids, a mesh lid or cheesecloth/mesh covers for proper air circulation and drainage.
- High-quality microgreen seeds such as broccoli seeds.
- A spray bottle filled with water for misting seeds.
- Paper towels or another suitable growth medium (e.g., coconut coir).
Sterilize Tools Before Use
Before starting:
- Wash your mason jars thoroughly with warm, soapy water.
- Rinse well.
- Allow them to dry completely before use.
If using mesh covers or cheesecloth instead of perforated lids, make sure they're also clean.
Measure Out Seeds According to Package Instructions
Different types of microgreens require varying amounts of seed per jar. Follow the package instructions when measuring how much seed you need for each variety you're growing. A small amount usually goes a long way.
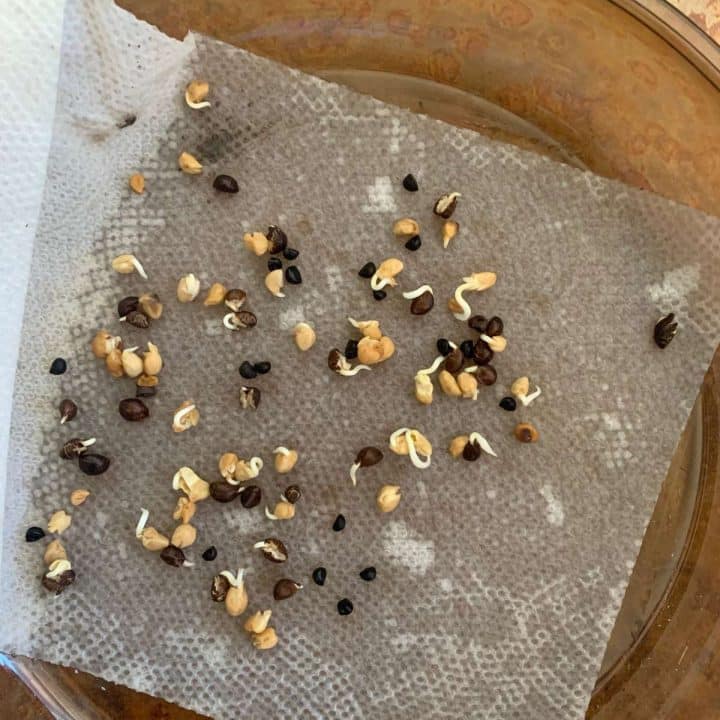
Rinse and Soak Seeds
Rinse the seeds with fresh water in a cool, clean water strainer to remove dirt and dust. Soak the seeds in a bowl of warm water for 6-12 hours to stimulate germination.
Prepare Growth Medium Mixture
Moisten your paper towels, potting mix or chosen growth medium with enough water to make it moist but not soggy.
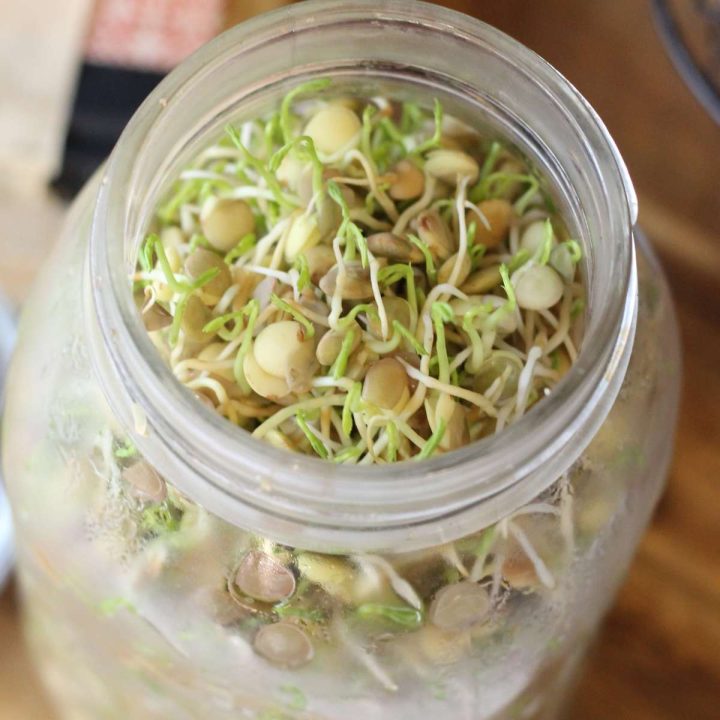
Sow Soaked Seed Evenly Inside the Jar
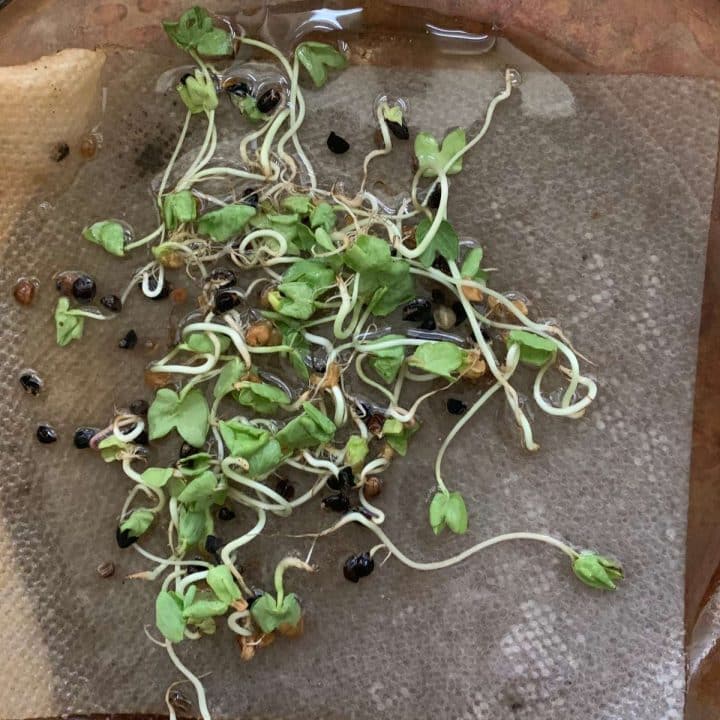
After soaking and draining excess water from the seeds, spread them evenly over the surface of the growth medium inside each jar. Using paper towels in a wide-mouth jar is the easiest way to grow microgreens in a small space. Press gently into the paper towel, soil, or potting mix without burying them completely.
Mist Seeds With Water and Cover for Initial Germination Period
Using a spray bottle, lightly mist seeds with water until damp but not soaked. Securely place perforated lids or cheesecloth/mesh covers on jars, ensuring proper air circulation while keeping seeds within jars during germination.
Move Jar to Sunlight After 3-4 Days of Darkness
For optimal microgreen growth, keep jars in a dark area at room temperature for approximately three to four days after planting. This encourages root development before exposure to direct sunlight.
Once sprouts begin emerging from the soil surface, move the jars into indirect sunlight near a windowsill or another well-lit location. This will help them get adequate light throughout the day without overheating.
Harvest Microgreens When Ready
Your microgreens will be ready for harvest when their first set of true leaves appear. This typically takes one to two weeks after planting, depending on the variety. To harvest your fresh greens, snip off shoots above the soil line using clean scissors.
Serve your microgreens right away as part of your favorite recipes. You can also store them in the refrigerator for up to a week.
Creative Ways to Eat Microgreens
Fresh microgreens can be used in various recipes such as salads, stir-fries, sandwiches, hashes, and baked meals. They are easier to grow than traditional sprouts but offer more nutrients per serving. This is due to their concentrated nutrient content during the early development stages of the plant life cycle.
Here are a few ways you can incorporate microgreens into your everyday meals:
Add Microgreens to Salads
Adding microgreens to your salads is an easy and popular way to enjoy their flavorful and nutritious benefits. Their vibrant colors and unique flavors will enhance any dish while providing a nutritional boost. For example, mix arugula and radish microgreen salad, or add broccoli microgreens to a classic Caesar salad for an extra crunch.
Stir Them into Stir-Fry Dishes
Stir-frying is another excellent way to use microgreens in your cooking since they cook quickly without losing much of their nutritional value. Toss them in with other vegetables towards the end of the cooking time so that they retain their fresh taste and texture. Add kale or mung bean sprouts for added flavor.
Top Sandwiches with Microgreens
Sandwiches provide yet another opportunity to incorporate microgreens into your meals. Microgreens can be substituted for lettuce or added to other components to make a healthier and more delectable sandwich. Add alfalfa sprouts to an avocado and turkey sandwich or layering radish microgreens onto a classic BLT.
They're also great additions to smoothies, omelets, and pizza toppings.
FAQs
You have questions. I have answers!
Can You Grow All Microgreens in a Jar?
Not all microgreen varieties grow well in jars. Some may need more space or different growing conditions than what jars offer. When starting with mason jar microgreens, it's best to choose beginner-friendly options like alfalfa, broccoli, kale, and radish sprouts.
How Do You Grow Microgreens Without Soil in a Jar?
Growing soil-free microgreens involves using alternative growth mediums like paper towels or coir fiber mixed with vermiculite and sand. These materials retain moisture well while allowing proper air circulation around roots. Follow standard seed soaking and sowing procedures before placing them on top of your chosen medium inside the container.
Now that you know how to cultivate tiny greens in a jar, you can savor fresh and healthy veggies all throughout the year! Microgreens are simple to produce, require only a tiny area and supplies, and bring plenty of health benefits.
By following our step-by-step guide, choosing the right seeds for your garden, caring for your plants properly, and using your homegrown microgreens in recipes creatively, you can produce delicious greens that will enhance any dish.
Like this post? Save it, share it, and read it!
How to Grow Microgreens in a Jar
Learn how to grow microgreens in jars on your kitchen counter or in your cupboard and you'll enjoy nutrient-packed, tasty toppings all year long!
Materials
- High-quality microgreen seeds such as broccoli seeds
- Paper towels or another suitable growth medium (e.g., coconut coir).
Tools
- Glass jars, such as mason jars
- perforated lids OR a mesh lid OR cheesecloth/mesh covers
- A spray bottle filled with water for misting seeds
Instructions
- Wash your mason jars thoroughly with warm, soapy water. Rinse well. Allow them to dry completely before use.
- Measure out your seeds according to the seed packet instructions.
- Rinse the seeds with fresh water in a cool, clean water strainer to remove dirt and dust. Soak the seeds in a bowl of warm water for 6-12 hours to stimulate germination.
- Moisten your paper towels, potting mix or chosen growth medium with enough water to make it moist but not soggy.
- After soaking and draining excess water from the seeds, spread them evenly over the surface of the growth medium inside each jar. Press gently into the paper towel without burying them completely.
- Using a spray bottle, lightly mist seeds with water until damp but not soaked. Securely place perforated lids or cheesecloth/mesh covers on jars, ensuring proper air circulation while keeping seeds within jars during germination.
- Keep jars in a dark area at room temperature for approximately three to four days after planting. This encourages root development before exposure to direct sunlight.
- Once sprouts begin emerging from the soil surface, move the jars into indirect sunlight near a windowsill or another well-lit location.
- Your microgreens will be ready for harvest when their first set of true leaves appear. Depending on the variety, this typically takes one to two weeks after planting.
- Snip off shoots above the soil line using clean scissors to harvest your fresh greens.
- Serve your microgreens right away as part of your favorite recipes. You can also store them in the refrigerator for up to a week.
Recommended Products
As an Amazon Associate and member of other affiliate programs, I earn from qualifying purchases.


I love adding microgreens to my avocado toast in the morning, so this has been so helpful! I was surprised how easy it was!